


this is how i made my rainbow...first i selected a palette of colors...
i added bright pink to my mix...
i added bright pink to my mix...

next i determined how large i wanted my squares and ultimately rainbow to be...it was a bit tricky for my windows because of all the mullions... :/ ...and...i ended up miscalculating and wasn't able to use the lavendar as i had planned...if you want your rainbow to be more free form you can simply tear pieces of tissue paper for your design...also you can layer more tissue...it will be beautiful!! have fun!!

cut your squares...i doubled up the paper a few times and was able to cut out multiple squares at a time that way...

the trickiest part was getting the first arch right...i used a fine point washable marker to lightly sketch the shape before i started my first row...next i made many "tape rolls"...this is done by cutting apiece of tape and attaching it to itself, sticky side out. i then cut each tape roll in half and used the piece of tape to pick up a piece of tissue and then tape it to the window. this worked really well because the tissue stacks had a tendency to stick together. in the photos you can see the tape rolls but it seemed like the best way to attach so many squares...this is what amanda jane jones did...the person that inspired this design...

i decided to cover the mullions with paper too so i just loosely taped additional pieces of tissue to make the rainbow colors continuous...

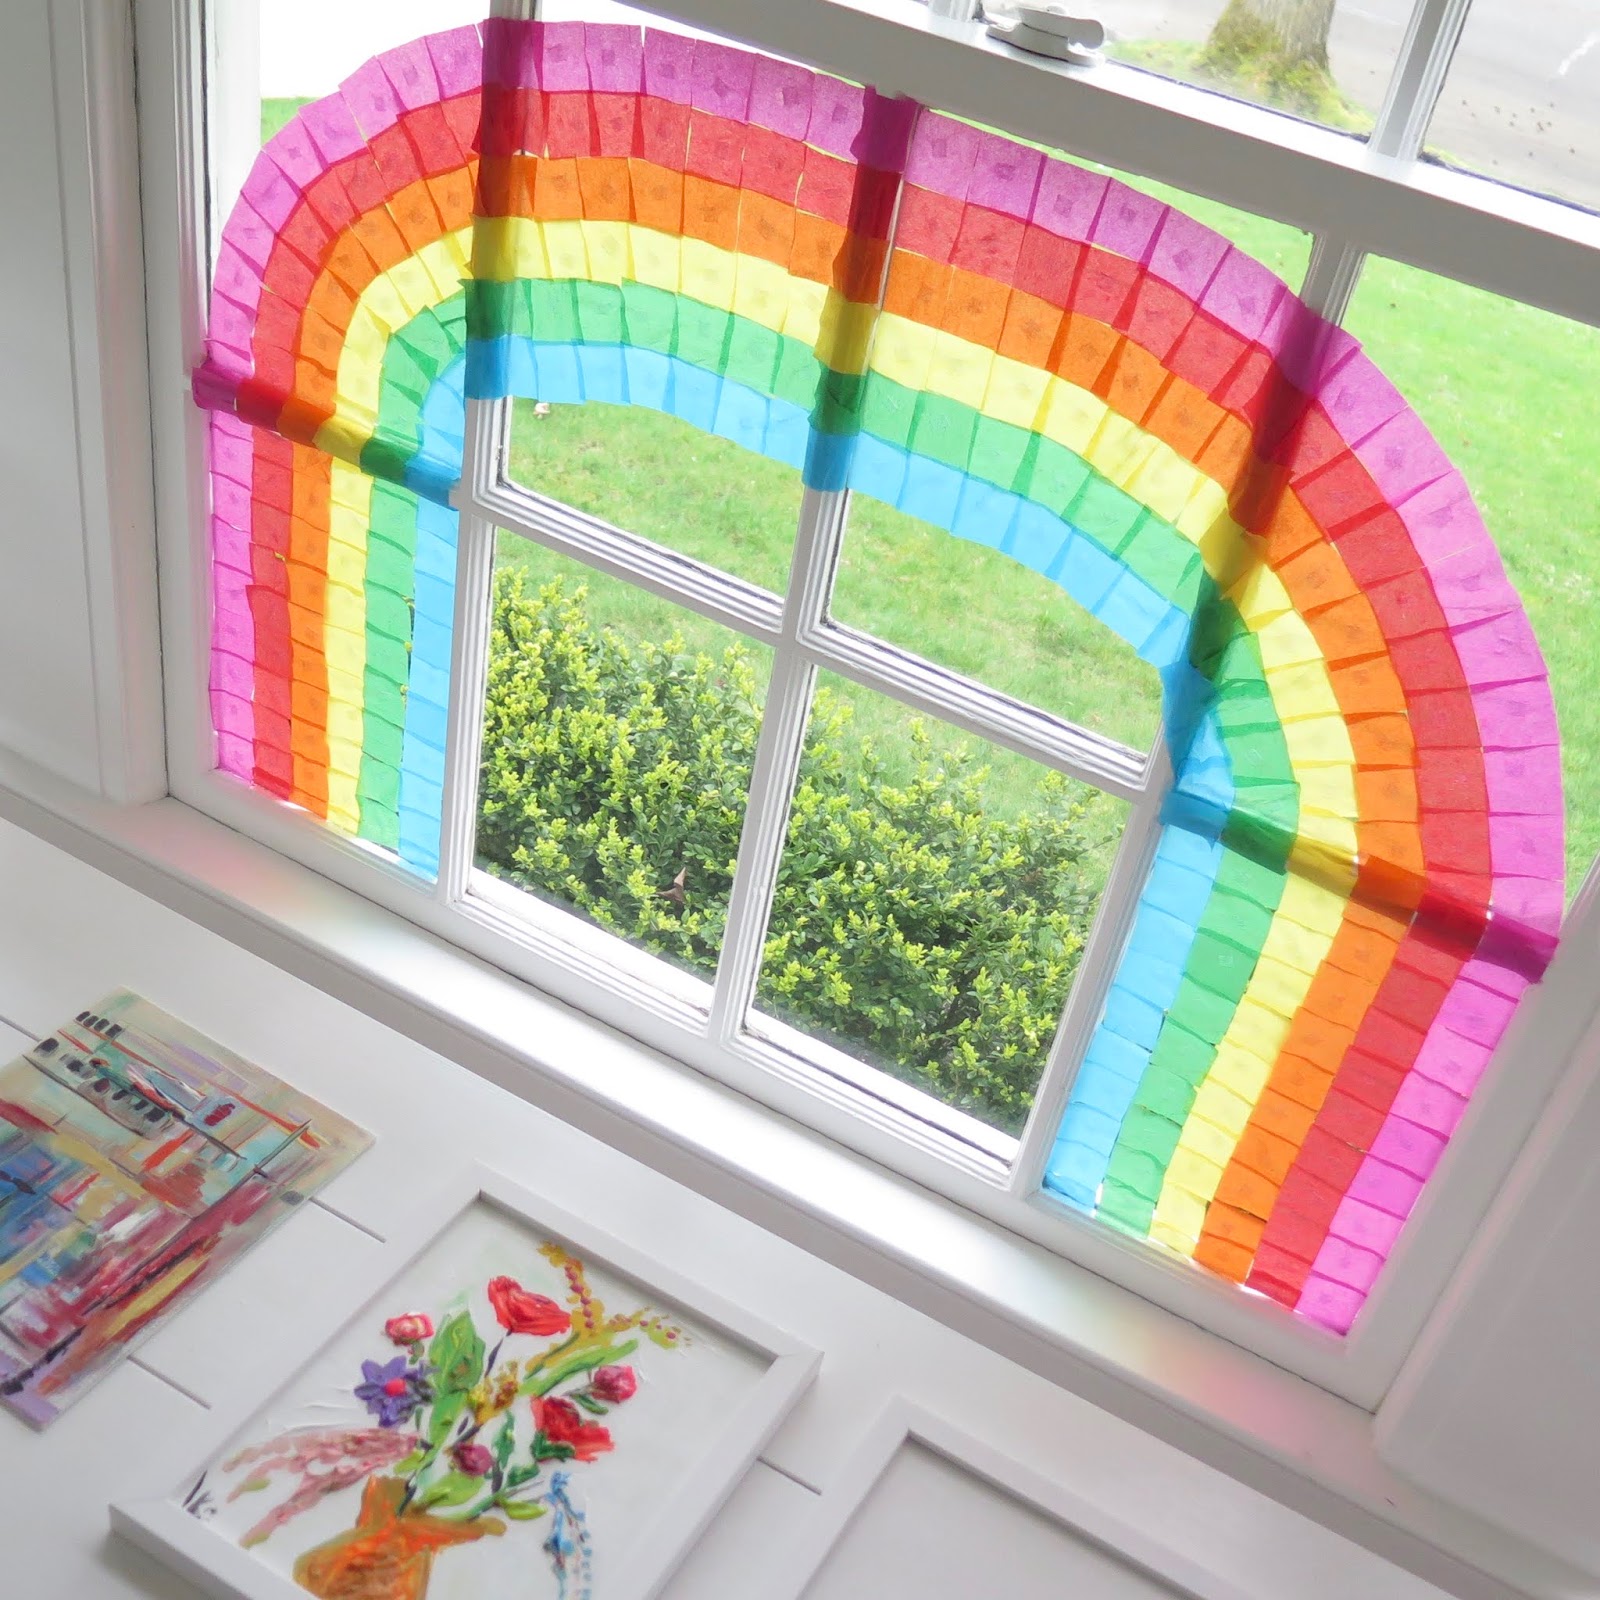


from the inside the rainbow just glows!!


rainbow glowing for the world to see...
inspired by amanda jane jones...a project as sweet as can be!!
little by little rainbows in windows here and there...
reaching out with love with a design that says i care...
"a symbol of hope"...and i couldn't agree more!!
in the window of the white house with the bright white door!!
No comments:
Post a Comment